Image 1 – Get arounds we used to do in the begining of every class. On the right two colleagues of mine and on the right our teacher.
This one is based precisely in dichromate combined with gum. Gum being the original gum, not the resulted processes we commonly know.
So gum has it’s origin in trees, we could almost say that trees sweat gum, as they produce this kinda oily and thick substance that is not soluble in oils or alcool but that you can easely wash out with water. Gum Arabic is a mucilage that is the most common form of this, and was widely used ancient times as glue, as coating for ceramic and fabric and was and still is also used for this photographic process.
This process is done in layers in the majority of times, with watercolor (always in the same color). If you desire just one layer you can go with gouache.
The thing with the ink is that the gum itself has no color, so you mix it with the pigment and when exposed to light it hardens and so fixes the other element added. This is the reason why you can pretty much do it in any color you like (just not black, since it sticks to har in the areas were it is supposed to wash of).
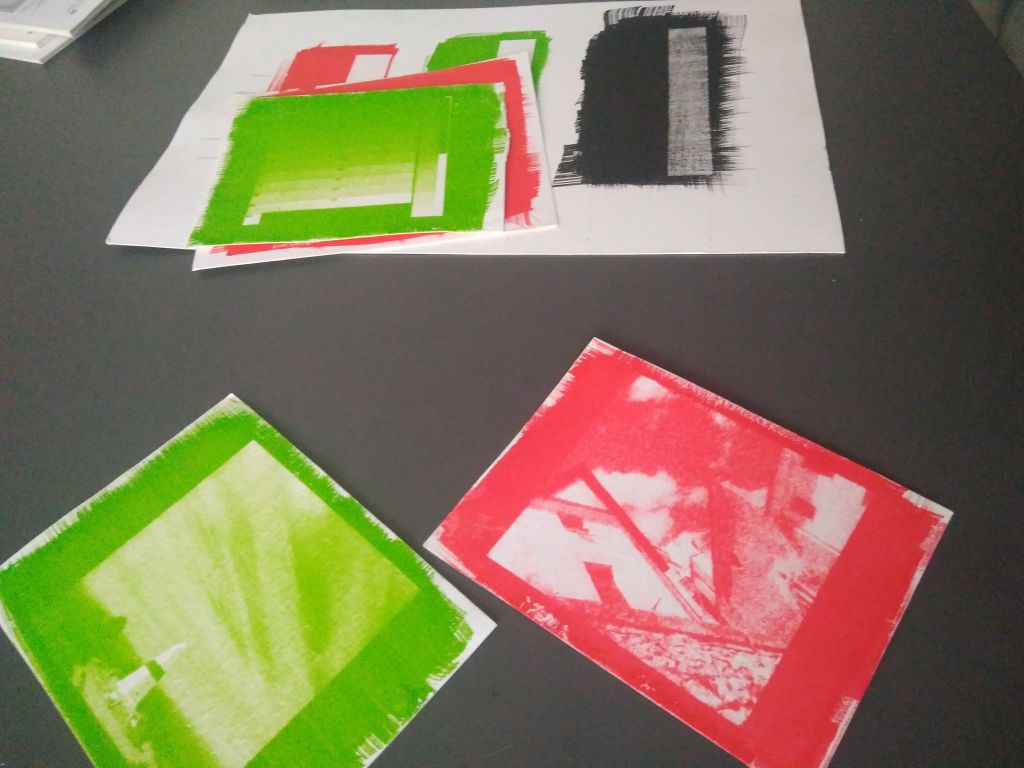
Image 2 – Color tests, and in the back you can see what happened to the black pigment once it stuck to the paper, it didn’t go back to being white.
Origin
So apparently, like almost everything in photography, a lot of people came up with the same conclusions and ideia that gave birth to this process.
Let’s just list them, shall we? I’m feeling impatient today
Loius- Nicolas Vauquelin (1763 – 1829) was a French chemist that in the lates 1700 documented the sensitivity of these materials to light, being the first to do so.
Mungo Ponton (1801 – 1880) a Scotish in 1839 discovered that dichromate salts were sensitive to ultraviolet light, and using sodium dichromate and a colloid acctually managed to print a photography!
Henry Fox Talbot (our old acquaintace) in 1854 also just documented during experiments that arabic gum and gelatin became unsoluble when exposed to light
John Pouncy (1818 – 1894) in 1858 started using color pigments (ink) to produce photographies.
Recipe time!
Ingredients:
Canson acrylic A3 paper 400gr (specifically because of the fibers and sizing of this paper, that allow it to spread ink evenly without blurs)
Guache
Brush
Tap water
Solution:
0,6gr pigment
0,4 ml Arabic Gum
0,5 L distilled water
0,32 ml ammonium dichromate (26%)
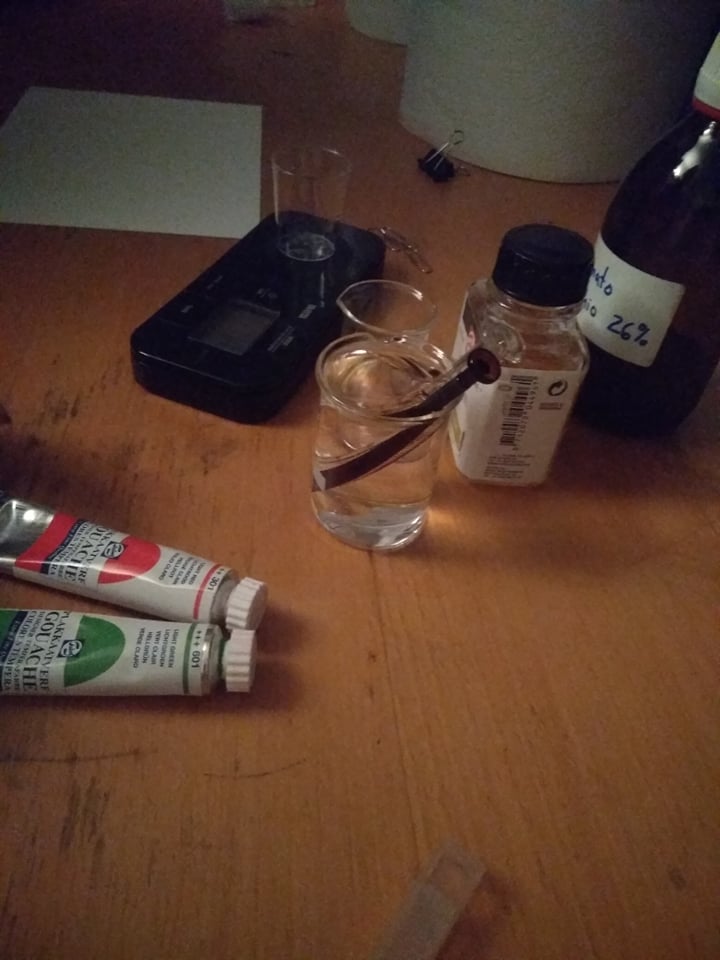
Image 3 – Our materials, to be fair for once and acctually showing them instead of just listing them
Recipe:
1stmix the ingredients for the solution in a glass recipient and stir it also with a glass object (use a candle for light)
2ndcut the canson paper into whatever size you like
3rd put the solution on a paper with the brush, softly not to leave marks and fast enough so the gum doesn’t start to dry out by itself (use a candle for light)
4th let it dry out a bit and then prepare your negative/object and your press
5th expose it to light for 4 minutes
6th take it out of the light and the press, and put in water
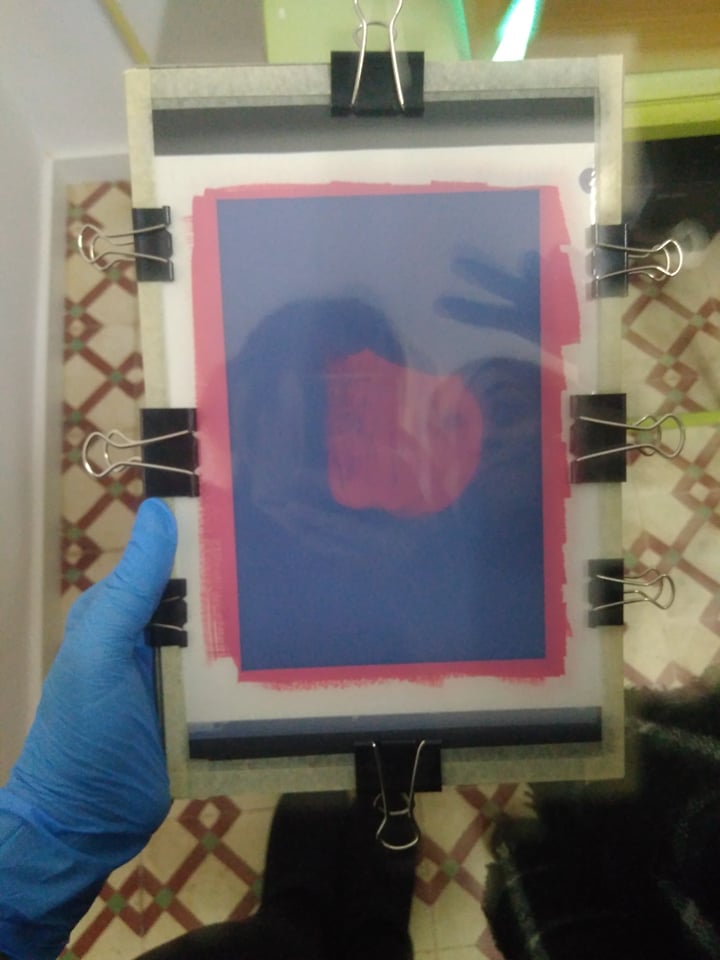
Image 4 – My press with my binders (a lot of them because i never made the same mistake as i did in salted paper again! If the negative is not tight together with your paper the lines will blurr) and also my and a colleagues reflection on the glass
I changed my water several times (being careful not to let the pressure of the water touch my paper), almost every 10 minutes for the first hour. And then let it stay in water for 24 hours, and then ran it under falling water so it woul speed up the process a bit.
And also keep in mind that when you take it out of the press you don’t see any image, don’t be frighten, it is there, under all that ink.
And vólia! The unexposed areas are gone and it looks like a paiting.
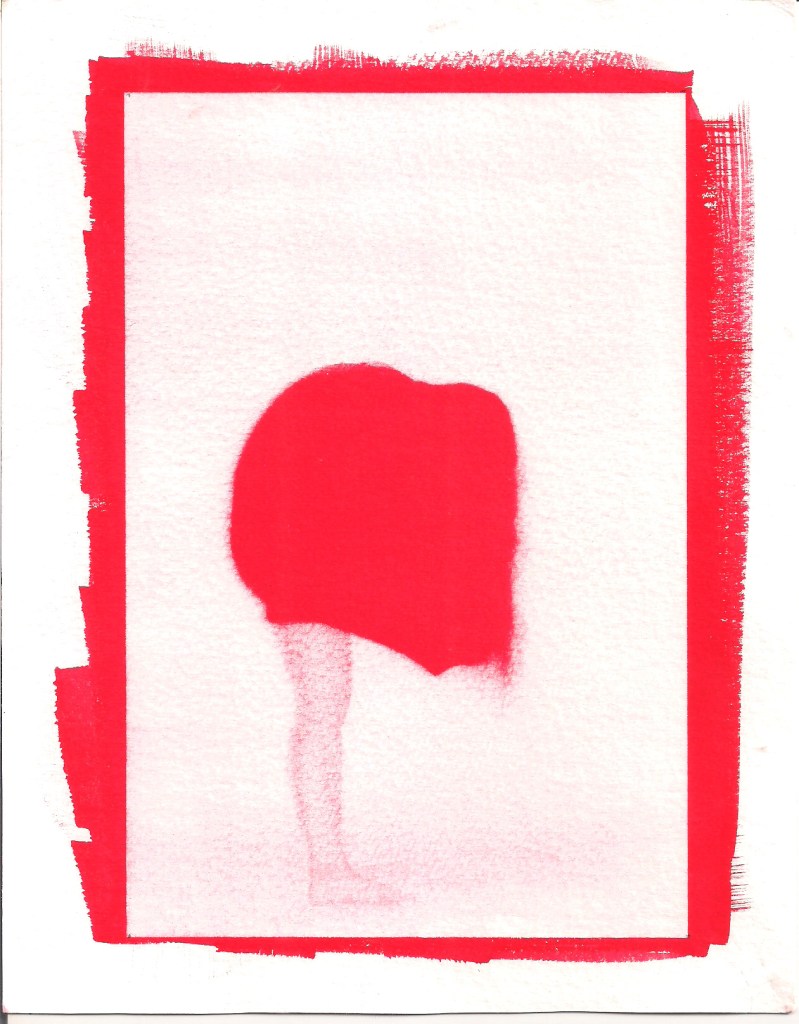
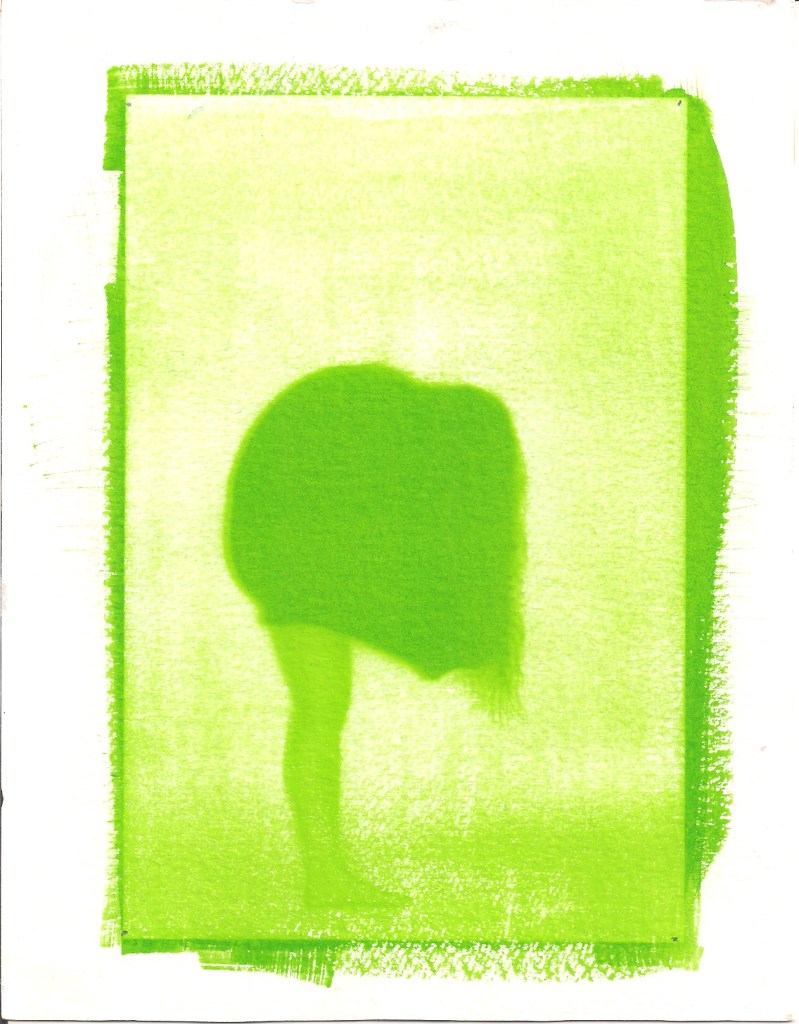
Image 5 – Final result of my first attempt with red gouache. I really like that. I like the contrast and the vivid color, also love the middle tones on the leg. And the lack of a lot of detail on the hair (because it was a dark shirt and dark hair) gives it a more twisted look that i enjoy very much.
Image 6 – Second attempt with some leftover solution from a group of colleagues, i didn’t like the green at first but i have to admit i kind of enjoy this final result to. Although it is clear that green has more detail into it than red, wich i don’t like as much on the hair, it has a better effect on the leg…. So also a nice contrast and better middle tones.
Also it was fun to make because although i was the one that took this picture, the one that is in it is acctually my colleague (the one on the reflection on the last one) so they are now souvenirs for us!
I hope you enjoyed my “journal” of my classes. I had a lot of fun experimenting these and hope i can push someone else into doing so to.
Also hope i get better at this and get the chance to write some more (outside of classes of course, they are over now) about some other cool processes i heard about in here.
Wish me luck, beacuse i wish you to all the luck too in experimenting these! We all need it very badly!
Since we opened a door through salted paper to gellow and silver to be allowed in, we will continue with this kind of work.
This was thrilling. With this process we can print pictures in almost any kind of material. I don’t mean any kind of paper, I mean material! Glass, wood, stone, paper, plastic, fabric, you name it.
Let’s continue with our recipes, shall we?
Possible ingredients used in these emulsions:
Watery veichle – Water and gelatine, were the cristals will be scattered
Silver Halide – Silver bromide, silver iodide or silver chloride
Anti veil – potassium bromide, wich pretty much avoids the development of a white “veil” on the image’s surface
Anti fungus – Fenol
Sensitizer agents – Active gelatine, gold salts, fixator in small amouts or dye. These will incfease the sensitivity to light.
Hardening agents – Like formalin or chromium salts, they reduce the gelatin’s capacity to absorve water, this way, preventing it from slipping out of the material chosen (like it happened to me, but we will get there)
Plasticizer – these facilitate application of the emulsion in the surfaces chosen
How to “cook” liquid emulsion:
1st – Precipitation – When through precipitation insoluble cristals are formed
2nd – Maturation – the growth of the insolubl cristals takes place
3rd – Washing – Pretty much just washing the excess of cristals
4th – Post Maturation – The adding of gelatine, sensitizers and dyes (just like it is described in the ingredients)
But what happens, that turns gelatin into a light sensitive material you might ask?
At its heart silver gelatin photography is a kind of alchemy: light and chemistry are used to reduce light sensitive silver salts suspended in a gelatin emulsion into pure silver. During the manufacturing process ions of silver bonded to atoms of the halogen family (usually bromine, chlorine, iodine) form crystals of water insoluble silver salts, known as silver halides. These are suspended uniformly in a flexible gelatin emulsion which is coated on a transparent base. Unlike their photographic predecessors, these crystals are shelf stable for long periods of time.
Once exposed to light the crystals absorbs the energy of photons. This energy causes atoms of metallic silver to build up flaws in the crystal. The more photons absorbed by the crystal the denser the cluster of silver atoms grows, forming a latent image, once enough silver has formed on the surface of the crystal it becomes something that you can develop.
Before we move on, you might ask is who the heck thought of ever using gelatin to fix photographs?
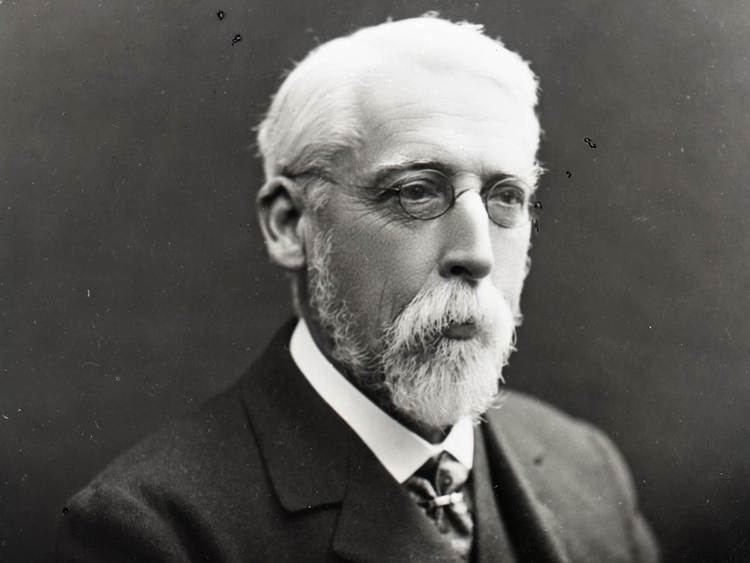
Image 1 – Richard Maddox
Well, that was Richard Leach Maddox. He was the first to invent a relatively stable silver gelatin and patent it (yes, someone had the same idea first and forgot to claim it in time). This emulsion could be coated on glass, so that photographers didn’t have to make their own light sensitive materials, and could be marketed, wich was brilliant.
Maddox’s need for inspiration came from becoming sick from the fumes produced by the mixing of the emulsion for wet collodion plates, that also had to be prepared and placed on glass immediately before exposure (if the emulsion turned hard or dry you would have to start over again).
Of course Maddox’s technique was only perfected to the point that it was sensitive enough for short exposures. Later coming out as negatives, that could be commercialized in a relatively cheap way, and so lauching photography as an art form anyone could do.
My take on emulsion
The process I used in class was supposed to be simple: we used commercial liquid emulsion and a surface of our own choosing. I chose glass (heads up, biggest mistake of my life).
We started preparing our materials for the emulsion. Those who had stone for example had to put a coating on it, glass had to be treated so it would have micro abrasions (we basically scratched it in circular movements using alcool, water and calcium carbonate dust), but the right fabrics or papers don’t require this prep has they already have fibers to wich the emulsion can grab itself on.
The place was equipped with red lighting, as the others expose constantly.
The emulsion has to be warm so it turns liquid, but we can’t just heat it directly because it will affect it’s components, loosing their sensitivity. So, in Portugal we call it “Banho-Maria” here let’s just say, contact heating. So you fill a tank with hot water and another tank with the commercial gelatin (do not use a metal spoon to take it of the jar, use glass or plastic has metal will interact with the silver), and then put the tank with the gelatin inside the one with the hot water. Evaluate it’s temperature until it’s between 35ºC-45ºC.
We all did the paper (Canson A3 cutted in smaller bits), because it is easyer to test on it the exposure time. To sensitize paper we folded it into little boats: folding each side in about 2-3 cm, and then the corners to the inside.
Now all that’s left to do is poor the emulsion in the surfaces, levelling those suefaces so the emulsion would be distributed equally. Run down the excess of emulsion back to the warming jar and save it in the fridge (so it goes hard again and doesn’t loose it’s proprieties).
Put dow the paper, glass, wood piece or whatever your using in a levelled surface and let it dry out in the dark. The emulsion will loose water and loose that relief you see, and then it will be ready to go into the light and expose.
The best and easiest kind of negative to use in this process is analog film, I used one I shot for another class, and put it in the amplifier.
Took the paper and ran some tests. So I put the paper under the amplifier and covered it with a black card, leaving only a stripe out and turned the amplifier on for 3 seconds, moved it a bit more to expose even more of the paper and did it again 3 secs more and so on, so on until the other edge of the image.
So I chose to expose my final image for the seconds correspondent to the layer that seemed to me had the best details. This is what I came up with.
I achieved nice contrast on the left side of the image, my face ‘though is lacking liquid emulsion, all the way to the bottom of the image to. And overall, this might not have been the best image choice i did so far… Sorry…
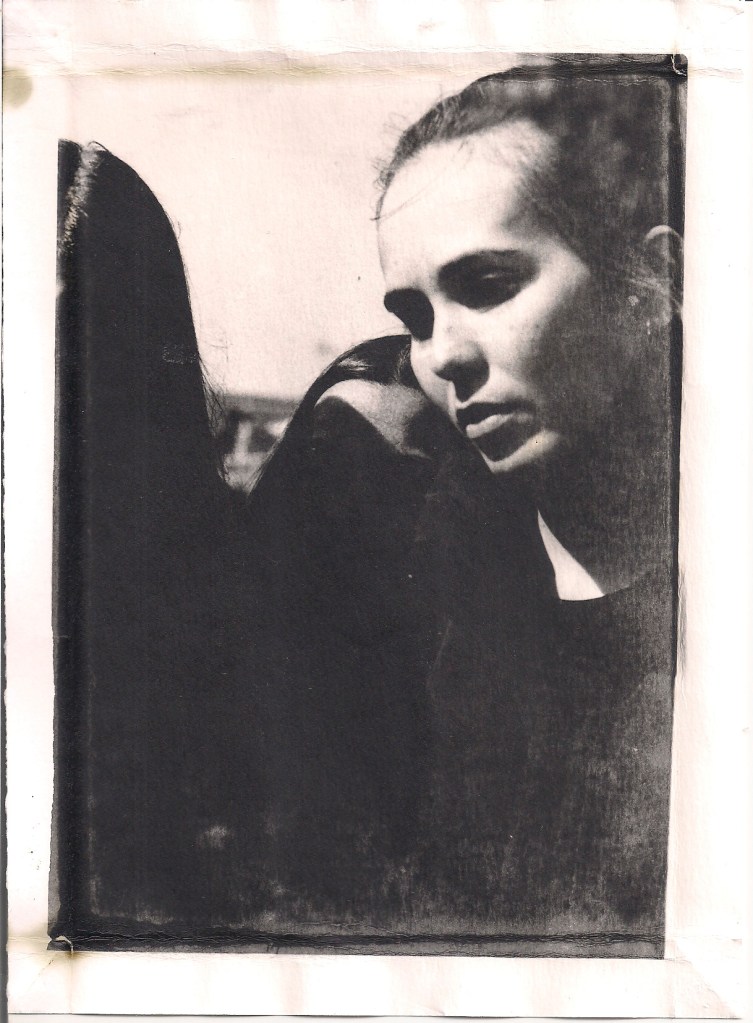
Image 3 – My image correctly exposed on paper. Poor choice of image, i know. I’m the one in the sun, and my two colleagues on the left were in half shade, so it didn’t quite turned out as i expected.
After exposing the glass (my own choice to use glass) it goes into the usual chemicals:
Developer – 30-90 seconds
Stopping bath – 30 seconds
Fixer – 10 minutes
Whashing – 30 minutes (changing the water regularly)
Sounds easy han? Well forget it.
For some reason that evades me completely, as soon as they where put inside the chemicals, the image started to peel off. It didn’t stick to the glass, it started floting around in the revealer (contaminating it for everyone else using it) and even if it didn’t completely peel of and by a miracle we would stay still holding the glass in the chemicals, it was peeling off some places else and the image would move around. So by the end of this, not only was it destroyed but also the corner of my image turned yeallowish, apparently form the excess of emulsion.
So in a bigger picture, glass was a total disaster (every other materials turned out fine). The image I chose may not also have been ther best idea (since my face was in the sun, colleague was in complete shade and a middle colleague was half/half. So to have a correct exposure, was barely impossible and the final result was, we only get the middle colleague and a bit of my chin. This part was my bad.
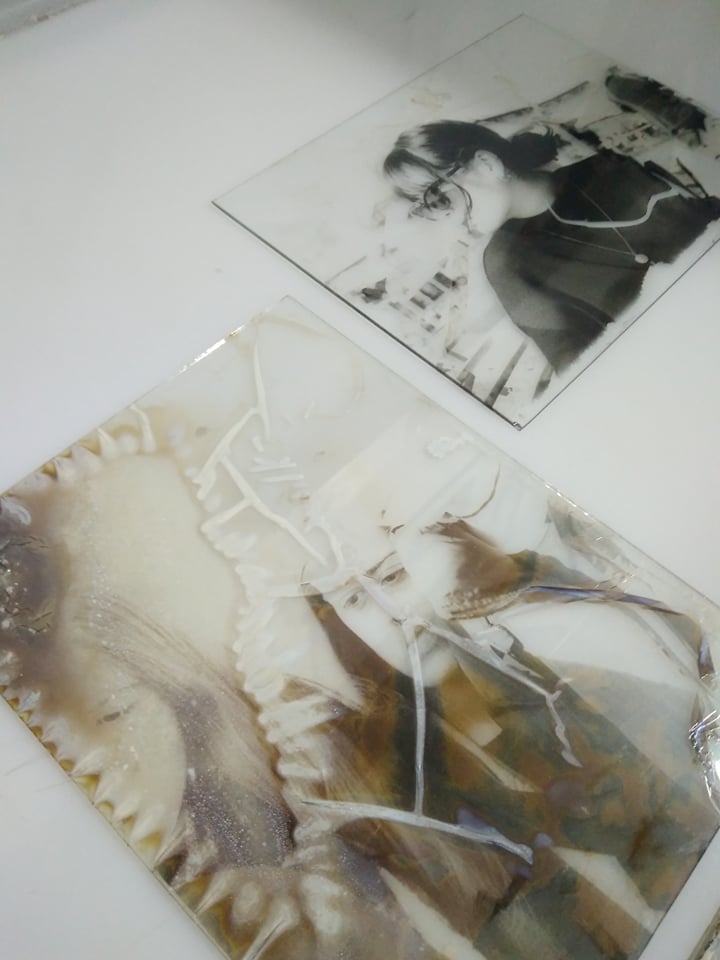
Image 4 – Delight yourself in my disaster. The image on the back might look ok on this picture, and doesn’t have the yellow part but is also peealed of.
Still the teacher allowed me to print my image in emulsion on paper (since she noticed how low the moral around the lab was) and I managed to screw it up to, because my image was bad quality and I also put to much emulsion on the paper, so it turned yellow to. Disaster.
Some sources of information about liquid emulsions that are better at this than me:
Martin Reed and Sarah Jones wrote: Silver Gelatin – A users guide to liquid photographic emulsions