The day came to do our first experiences. So the class was divided in two groups so we could work at the same time without to much of a mess. So half did photograms (inside the lab, just because we had one available, it’s not mandatory) and half lumens (outside, in the sun).
Let’s start by defining what this is, shall we?
Photograms ar photographies as we know them, only they are made without a camera and the colors are reversed (what had light on turns black, what doesn’t stays white) so they are almost like a shadow of what was placed on top of the paper. Photograms are presente since the begining of photographies history, and were givem many diferente names by each one of the people that tried, rediscovered or used them. Beacause, as i recall from my last post, it is impossible to give credit to jus tone person for this process.
The history of photography is punctuated by practitioners who have developed a technique or style that has become a part of art history. The first period of “photogram” exploration was to gain scientific record of natural objects (e.g. Anna Atkins). The second period was a rediscovery of the artistic potential as illustrated by Christian Schad, Man Ray and Lazlo Moholy-Nagy in the Dada, Surrealist and Constructivist periods of art, respectively.
Wedgwood called them light profiles.
Fox-Talbot called them photogenic drawings.
Niépce called them heliographism.
Man Ray called them rayograms.
Although i have to admit to have Man Ray’s rayographs has an all time favourite.
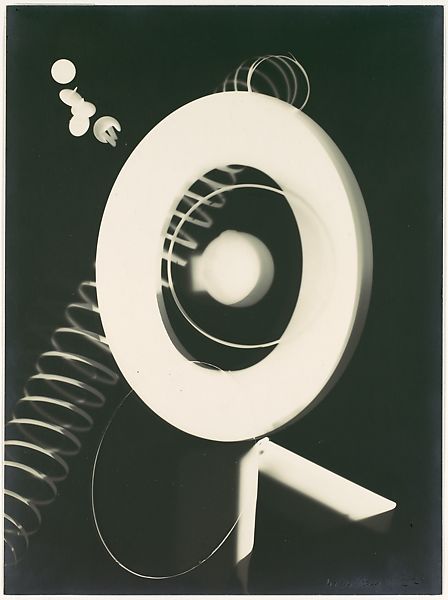
Man Ray made his “rayographs” without a camera by placing objects-such as the thumbtacks, coil of wire, and other circular forms used here-directly on a sheet of photosensitized paper and exposing it to light. Man Ray had photographed everyday objects before, but these unique, visionary images immediately put the photographer on par with the avant-garde painters of the day. Hovering between the abstract and the representational, the rayographs revealed a new way of seeing that delighted the Dadaist poets who championed his work, and that pointed the way to the dreamlike visions of the Surrealist writers and painters who followed.
My photograms
I will post this as if it was a recipe for food, because it helps me explain it and also i think it will help me understand it when the time comes to repeat the experience.
Now, first recipe:
- Source of controled light (we used photography amplifiers beacuse they have timers included, but a regular lamp and a chronometer will do just fine, it’s not an exact art)
- Photosensitive paper (Ilford worked just fine)
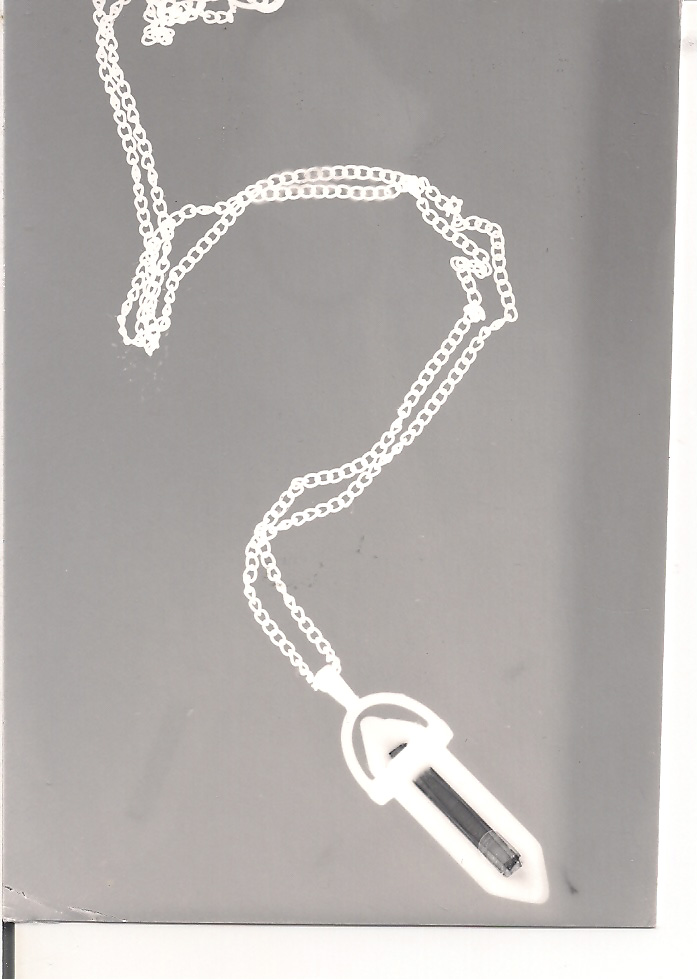
- Objects (this time bi or tridimentional, because ther is no need to flaten them, so i had a necklace and some plastic letters, and yes, i stole the idea from some of Man Ray’s photograms)
- Usual chemicals (developer, stoping bath, fixer and tap water)
Preparation:
Pretty much just adding the right amount of water to each chemical (following the manufacturer’s instructions) and putting them in order and separate containers.)
Process:
You can do photograms in basically any kind of light sensitive paper. We used silver ones (they turn into black when exposed). You place the paper in a surface and the objects on top of if. Place the light above them and figure out how much time you want to expose it, just through several small attempts. Keep in mind that transparent objects will require less light to go through and more dense ones will require a lot more time. But it is a quite experimental process, and a lot of fun to just do a bunch of small tests, and prepare yourself (or your timer) to countdown!
Count the SECONDS and turn of the light. You don’t see any image yet, normal. Grab that pape rand put it insider de developer container, and gently move the container around to cover the whole paper surface equally. After some time the image will start to show. After 2 minutes, move the paper into the stop bath (wich alters the pH and stops the developing process) for 30 seconds. Finally do the same thing but in the fixer, wich will remove the unexposed (silver in this case) cristals, thus making your image permanent.
The whole process is quite fascinating and it really helps us to understand where photography is coming from.
So, when i tis exposed to ligh, the silver cristals in the surface of the paper will get tiny craks, then the strong reducer present in the developer reduces the silver to the metalic state. The afterwards bath is the stopping bath, wich basically inhibits the reducer action in the surface so the revalation stops before we move to the fixating bath wich fixates the image by dragging and removing the remaining cristals that were still waiting to be used. This way the cristals that “saw” light turned darker and the ones that did not,were removed, and the paper stays as white as it was when manufactured. The ones that were not craked, did not combine with the revelatory chemical and were later washed out by the fixator.
I absolutely loved this class. The process, although simple, was my first ever contact with the chemicals and photography labs. It helped me understand how the chemicals work, and seeing the image being born was magical.
I just took the opportunity to have fun and experiment a lot with different materials, with different timings in the light and different densities. I cut some larger papers into tiny pieces so I could do smaller, but more experiences.
One of the ones I love the most is one that I (stupidly) exposed the paper in the worng side. So, when I placed the paper inside de revelator, it did nothing, it wasn’t exposed. Instead of throwing it away I took it out, shook it and placed it under light again (still soaked in chemical, and yes, I know how stupid it sounds) and then proceeded in the usual way. And my mistake turned out beautiful (just like Man Ray’s Portrait of Marquise Luisa Casati in 1922, caused by a bad tripod that fell of in the decisive moment, giving her 4 eyes). But in this case beacause instead of black, it turned into a beautiful shade of grey and strong white, looking like a strange x-ray.
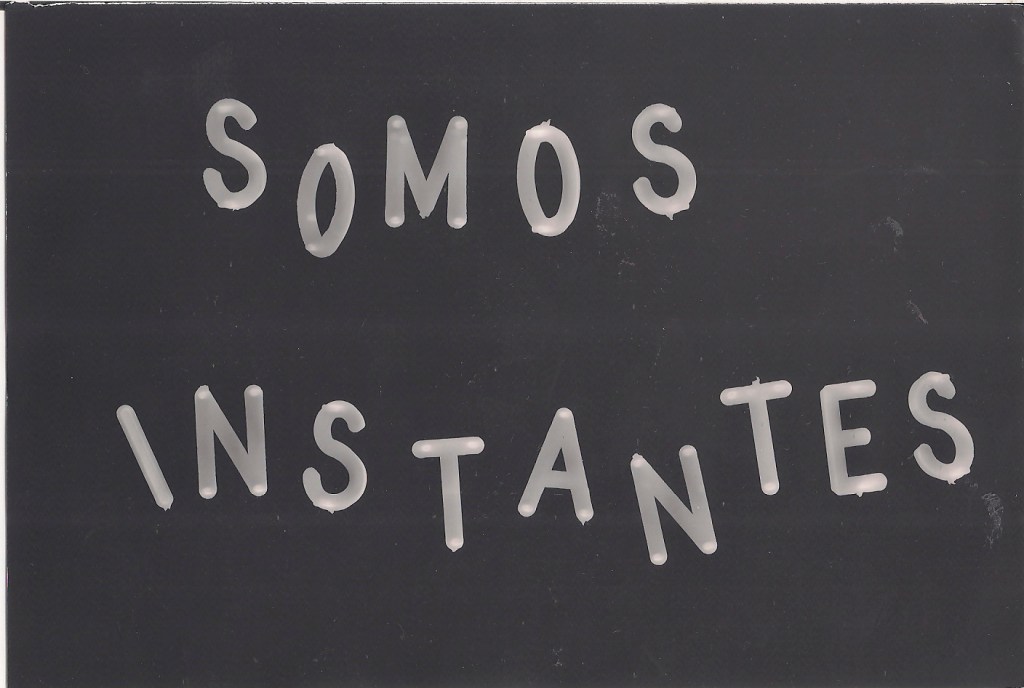
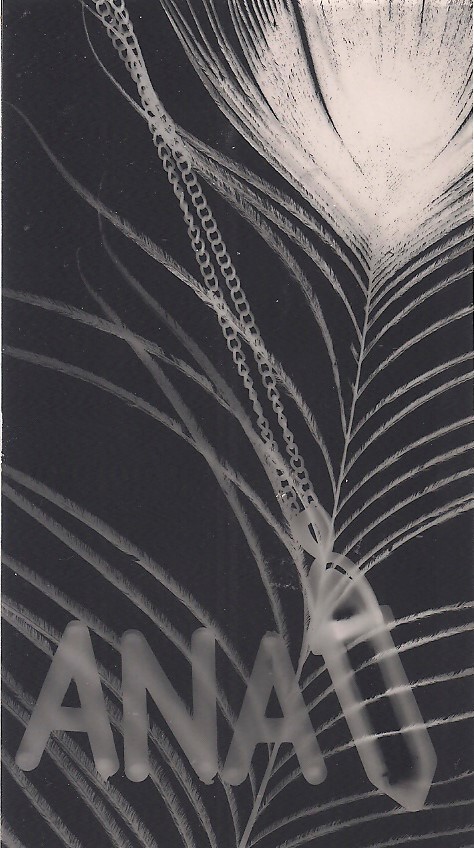
I always loved the black and white colors, so it would be hard for me to not like these. The contrast was better acomplished in the last two images of course, and I assumed these timings in the light were proper has i could see through the different densities materials and still have perfect white, and perfect black in the same image. Of course the paper also behaved beauthifully (it was a comercial grade) and it was matte wich brings out the dark tones.
